Non-US Cotton Operations
This document will assist in understanding the processes involved in handling International Cotton Trading and Inventory Management i.e. lots instead of individual bales (USA requirement)
1 COTTON PURCHASE CONTRACT
Regular Contract terms:Terms: FOB/FCA/EXW/DAF (Riga, Ilyichevsk, B-A, Uzbek terminal, Uzbek border)
Options (buyer’s option) FCA Origin, DAF Uzbek Border, CIP Russia, EXW origin or port.
Quality: Base quality (1/Urta type 35) with premium and discount for other grade and classes. Staple 36 at premium. Staple 34 at discount. Price differentials based on shipping terms/destination (FOB or FCA) will also apply. Quality Price Matrix: is fixed by authorities. Number of contracts: approx 20 contracts per season.
Payment terms:
Uzbek: usually 30 to 80% prepayment, always against Uzbek Bank guarantee reconfirmed by A-1 western bank.
Turkmen: 100 percent pre-payment, no bank guarantee (not implemented as of today)
Other CIS: payment CAD or 100% LC sight or Pre-payment against bank guarantee.
Pre-payment by Bank Guarantee: At receipt of swift from bank confirming receipt of pre-payment, the supplier will open a bank guarantee. Pre-payment are done on a contract by contract basis.
On call contracts (mostly Uzbek) fixing on call contracts is done on Avr. Index (Cotlook A and Uzbek components) On call terms (possible combination of following): contract date, registration date (when they confirm that contract is registered in Uzbek) pre-payment date, on delivery date, buyer’s call or seller’s call or specific date.
| GRADE | OLIY | YAKSHI | URTA | ODDIY | IFLOS | |
| BIRINCHI | (1) | + 5 % | +4 % | BASE | -3,5 % | -7,5 % |
| IKKINCHI | (2) | + 2 % | - 1 % | - 4,5 % | - 8 % | - 12 % |
| UCHINCHI | (3) | - 3,5 % | - 7 % | - 11,5 % | - 16 % | |
| TURTINCHI | (4) | -15 % | - 20 % | - 25 % | - 30 % | |
| BESHINCHI | (5) | - 45 % | - 50 % | - 55 % |
1.3 Staple Price Differentials
| Staple | Discount % |
| 34 (1-1/16’’) | -1.33% |
| 35 (1-3/32’’) | BASE |
| 36 (1-1/8’’) | +1.37% |
| 37 (1-5/32’’) | +1.37% |
1.4 Destination Differentials
| Incoterm/Destination | Unit Price |
| FOB Riga | On call/Aindex-Uzb.Average – USD70 (317.5 pts) |
| DAF Uzbekistan | On call/Aindex-Uzb.Average – USD85 |
| FCA Uzbekistan | On call/Aindex-Uzb.Average – USD100 |
| EXW Bukhara | On call/Aindex-Uzb.Average – USD150 |
The ownership date of goods will depend on the delivery terms, as per table below.
| Incoterm | Ownership date |
| EXW | At warehouse receipt date |
| FOB (case 1) | After 31 days in warehouse (port of departure) at warehouse receipt date |
| FOB (case 2) | If it is shipped before the 31 days in warehouse (port of departure) at B/L date |
| DAF | At date when goods pass the border (country of origin) |
| FCA | At loading date of truck/wagon (country of origin) |
Base grade should be ‘BIRURT’, port of origin ‘CIS OPT’ (CIS optional) and total quantity on contract header.
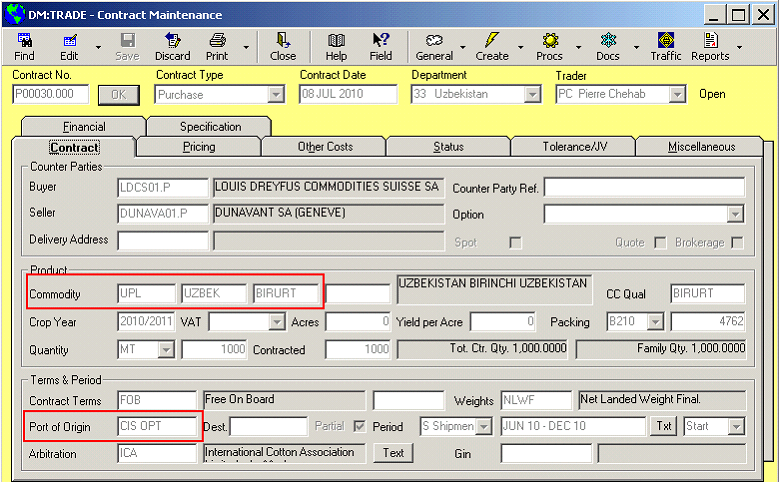
Setup the destination differentials at contract header level: Right click: Options and restrictions/Contract Options

Option type: Origin
Text: Buying Term/Location
Price Code: PTS
Premium/Discount: value in PTS

Summary of Buying Terms

The first tranche will represent the base quality. No pricing master for grade differencial is required for this it but the staple differentials will apply. Tranche contract from contract header level: Right click: Tranche

Quantity of each tranche should always be 0 (zero)
Grade: indicate all the grades we could receive from supplier in the “Grade” column.
Save tranches.

Contract after tranches have been done should look like this. One grade per tranche, total quantity still at header level

Setup the staple differentials on each tranche. Right click: Pricing Master

In the Payment Master tab

Quality Adjustments box

Differ. U/M for Stpl. must be %
In order for the calculation to be done properly, for the staple differential, the box “quality” must be ticked in the staple calculated on field, as under

In the Pricing Tables tab

Enter differentials per staple (expressed in %)

Setup the staple differentials on each tranche. Right click: Pricing Master

In the Payment Master tab

Quality Adjustments box

Differ. U/M for Grd. must be %
Enter the quality differential in percentage (according to the tranche’s quality)
example: Yakshi (tranche qual.) Urta (Base qual.) Qual. Adj. 104.000 on price only (i.e. + 4%)

| GRADE | DIFFERENTIAL |
| BIROLI | 105% |
| BIRJAK | 104% |
| IKIOLI | 102% |
| BIRURT | BASE GRADE |
| IKIJAK | 99% |
| BIRODD | 96.50% |
| UCHJAK | 96.50% |
| IKIURT | 95.50% |
| UCHURT | 93% |
| BIRIFL | 92.50% |
| IKIODD | 92% |
| UCHODD | 88.50% |
| IKIFLO | 88% |
| TURJAK | 85% |
| UCHIFL | 84% |
| TURURT | 80% |
| TURODD | 75% |
| TURIFL | 70% |
| BESURT | 55% |
| BESODD | 50% |
| BESIFL | 45% |
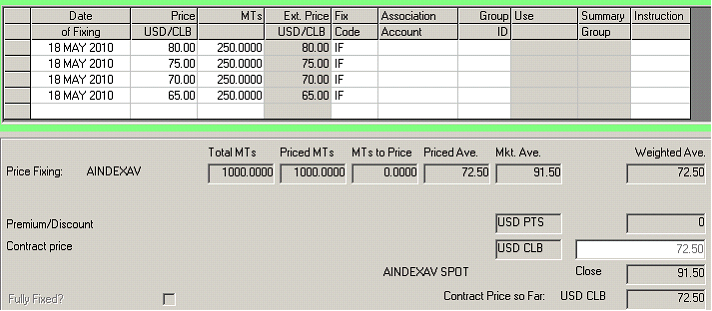
The contract will be fixed on 4 different fixation terms. (This is an example, it can wary)
Buyer’s call, Seller’s call, Delivery Date, Contract Date
At contract header level, right click: price fix

Enter each fixation. Date of fixing in the example below are not representative (we needed to create fixation on same day of contract for testing purpose)
Nb. Lots can’t be fixed prior to having a title date. From the contract header, right click: price fix

Right Click: reassign
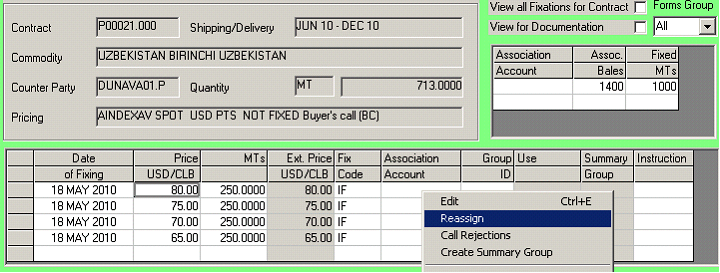
Click in the “to split” column of the fixation you wish to link to your lot.

Tick “select” for all the lots you wish to link to the fixation, then click “reassign”
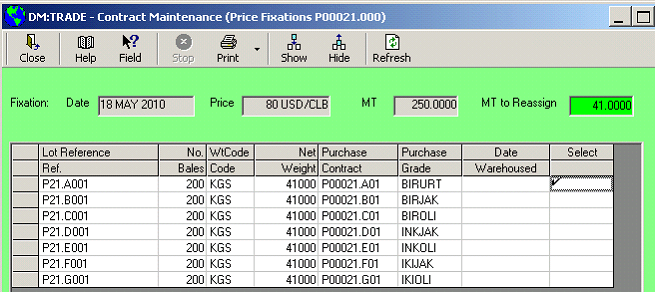

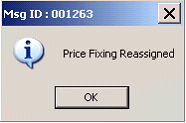
On contract header the initial fixation of 250MT will be reduced by the lot quantity that was linked to it (example fixation at 80.00 USD/CLB was 250mt minus the 41mt linked = 209mt remaining)
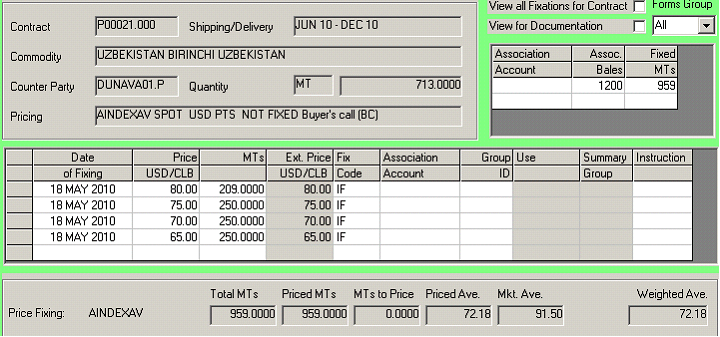
On the contract split (P00021.A01) the fixation reassigned to the lot can be seen as under.
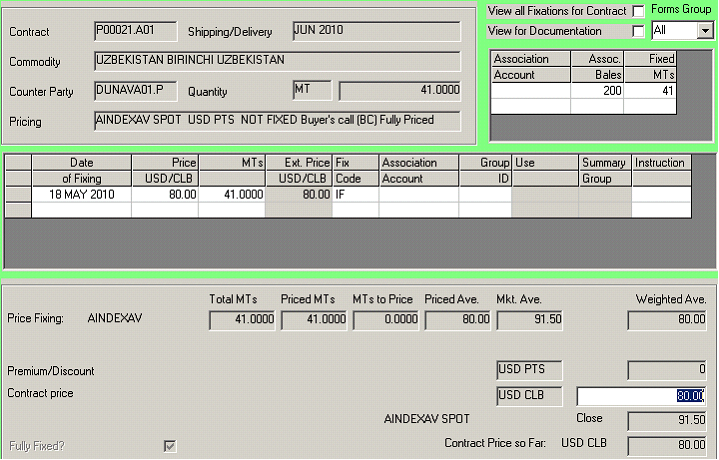
In the pricing tab of the lot (ie. Contract tranche P00021.A01) the fixing has been applied as per the reassignment process.

After re-assigning lots to fixation, the price fix screen appears as under. The total shown represents the quantity available for re-assignment.
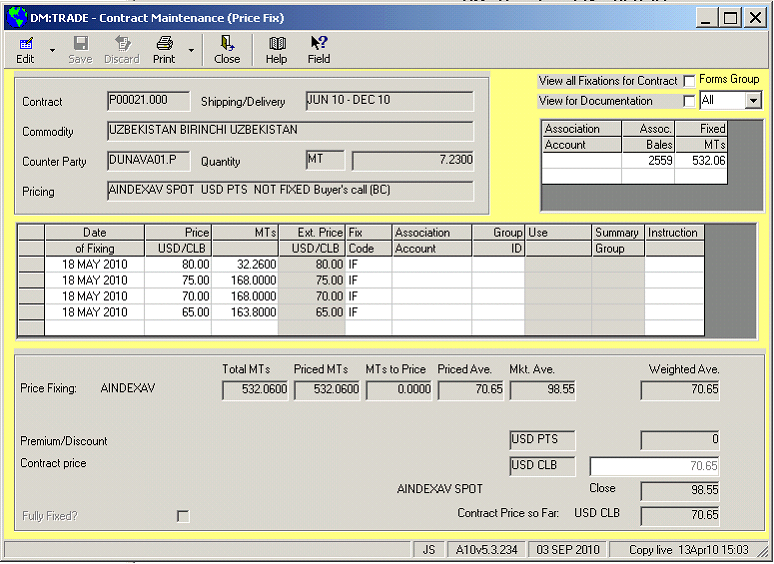
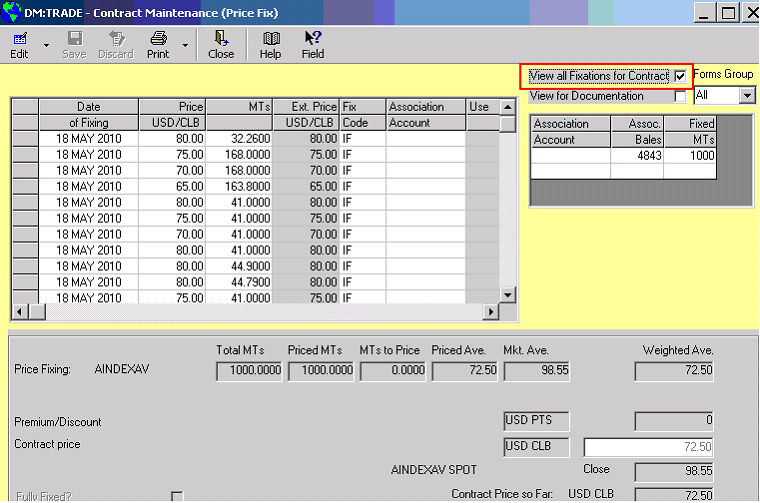
In order to view the fixation as initially done, click the View for documentation box. It will show the fixations as they were before we start re-assigning them (i.e. the initial fixations & terms)
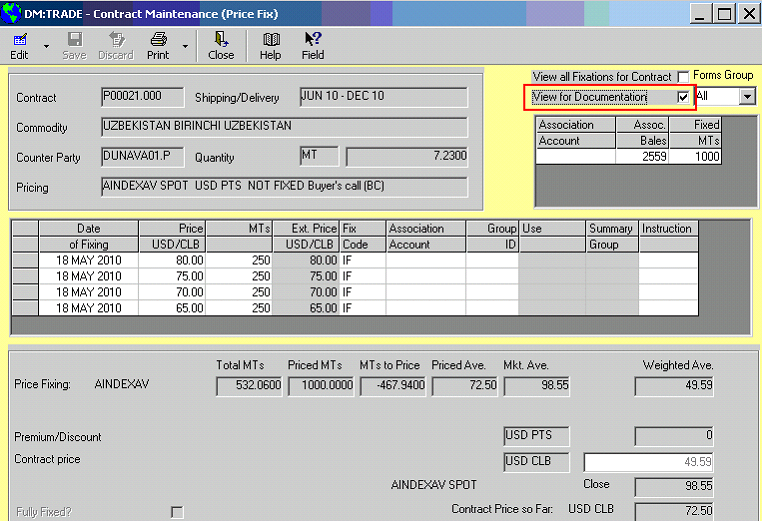
By clicking on the “view all fixations for contract” you will view all the fixations reassignment and total MT priced.
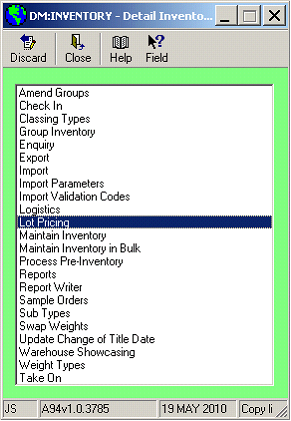
Prior to invoicing the lots, you might want to check that the price of each lot is calculated according to the differentials and price fix. Go to INVENTORY/lot pricing
You can filter lots by purchase contract number to see them. On the screen below, you can see the lot’s ref., grade, fixation, staple and destination. The lot price column shows the unit price after applying the differentials (premium/discount)
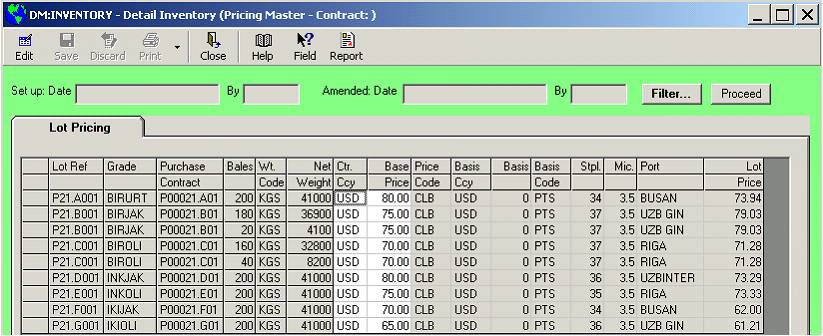
How is the lot price calculated?
Example:
Lot Specification: Grade: 1/Oliy, Staple: 36,
Fixation: Aindex: USD 0.90 + Uzbek/index: USD 0.80 = Average USD 0.85
Calculation
(Unit price * quality diff. * staple diff.) – Incoterm/destination. diff. * quantity
( 85 * 105% * 1.0137 ) – 317.5pts = USC 87.298
| ALWAYS MANDATORY | ||||||
| Field name | Description | Example | ||||
| lotref | Lot Ref. | 021-892 | ||||
| purchase | Purchase Contract No. (header) | P00032.000 | ||||
| purchasegrade | Cotton Grade | BIROLI | ||||
| reclassstaple | Cotton Staple | 36 | ||||
| packquan | Number of bales | 220 | ||||
| grosswt | Gross weight KGS | 43550 | ||||
| netwt | Net weight KGS | 42550 | ||||
| tare | Tare weight KGS | 1000 | ||||
| comments | Comments (buying term/destination) | EXW - Dest. Riga | ||||
| sellingtype | Company grade (Ex. Ronda/Pavel Etc. | PAVEL | ||||
| MANDATORY BY BUYING TERM | ||||||
| Buying Term | EXW | FCA | FOB/DAF/CPT | |||
| Field name | Description | Example | Description | Example | Description | Example |
| warehouse | Warehouse name abbr. | AKALT01.P | Transit destination (ex. transit to Bandar Abbas) | BANDA01 | Transit destination (ex. transit to Bandar Abbas) | BANDA01 |
| warehousedate | Warehoused date (YYYYMMDD format) | 20100925 | Departure date (Rail/roadwaybill date) | 20100925 | Departure date (Rail/Roadwaybill date) | 20100925 |
| warehousereceipt | Warehouse receipt no. | WHR-123 | | | | |
| portwhreceipt | Warehouse receipt date | 20100925 | | | | |
| titledate | Title date (YYYYMMDD format) | 20100925 | Title date (YYYYMMDD format) | 20100925 | | |
Go to INVENTORY/Maintain Inventory
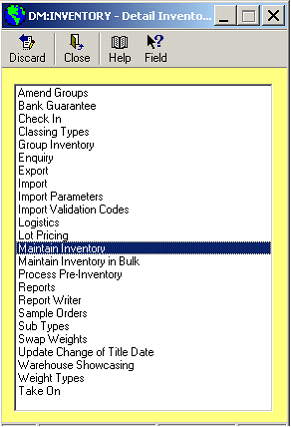
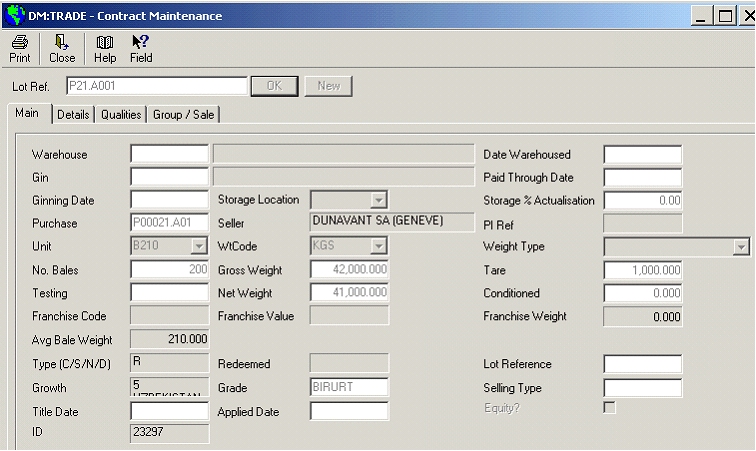
In Main tab, enter the Lot Ref., No. Bales, Gross/Net weight and Tare
Select the contract tranche according to lot quality.
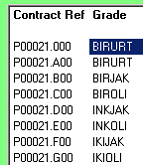
The lot quantity will be deducted from contract header. A new split will be created for each lot created (for tranche .A00 the first lot will be .A01)
In Qualities tab, indicate the staple of the lot in the Reclass Staple box

Save Inventory
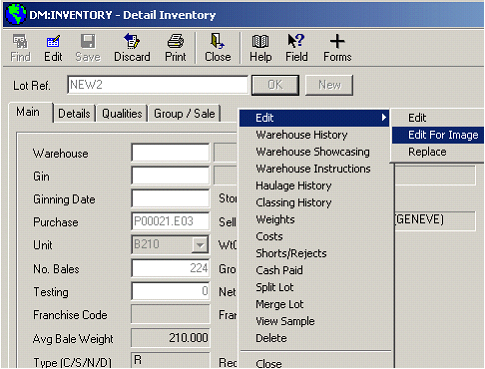
A convenient way to create several lots in a row on the same tranche of a contract (i.e. same grade as previous lot) is by using the “edit for image” function. Just change GW/NW/Tare/Lot ref. and save.
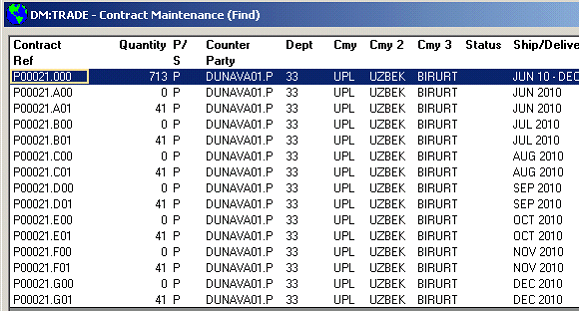
In the example below: one lot (41MT) was created for each of the contract tranches. (creating A01, B01, C01, D01, E01, F01, G01). The contract header quantity has been reduced accordingly.
IMPORTANT: After lot is created we must indicate its buying term & destination in the lot’s contact maintenance screen (at split level) in box ‘port of origin’ enter the buying term (example below: FCA UZB) and in ‘contract terms destination’ enter the lots destination (example below: BANDAR – i.e. Bandar Abbas)

Nb. If you add the port details after having priced (link to fixation) the lot the destination differential will be ignored.
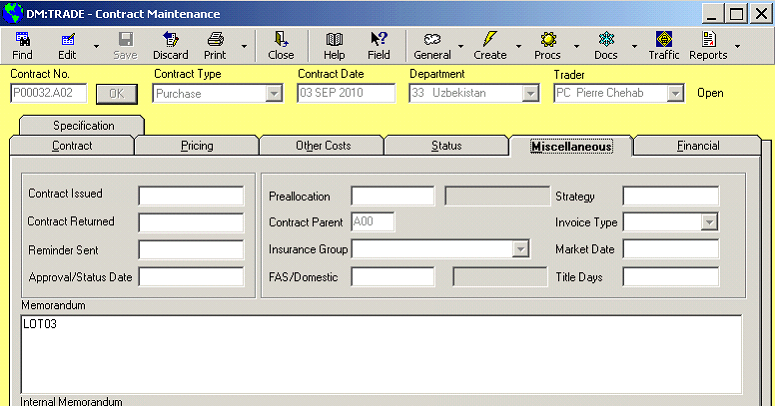
Moreover, we must also add the lot ref. (lot number) in the contract maintenance screen. Go to the lot’s contract split in the miscellaneous tab in box ‘memorandum’

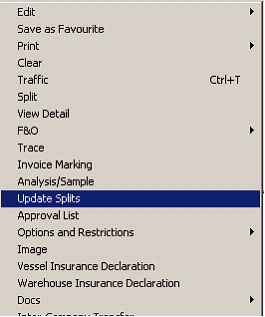
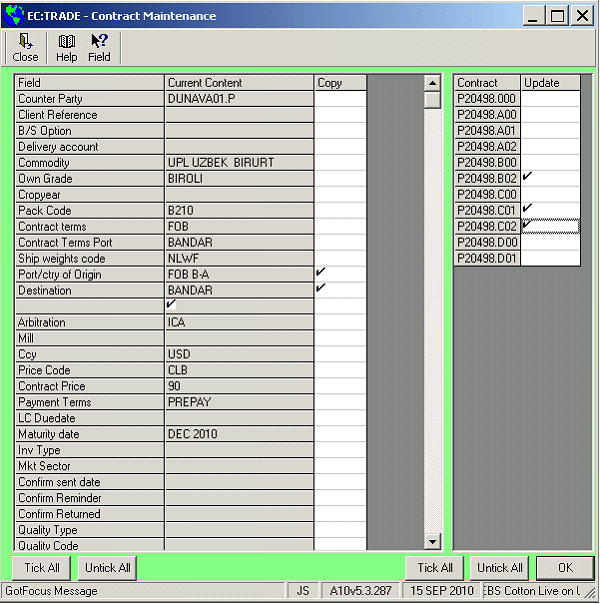
In order to update several split at once. Select a split and make the update on it then right click: update splits
On the left hand side, select the fields you whish to be updated on several splits at once (Port/Ctry of origin = buying term and destination of goods) on the right hand side select the splits you whish to update with the same values. Click OK
a. Set import parameters
Go to INVENTORY/Import Parameters
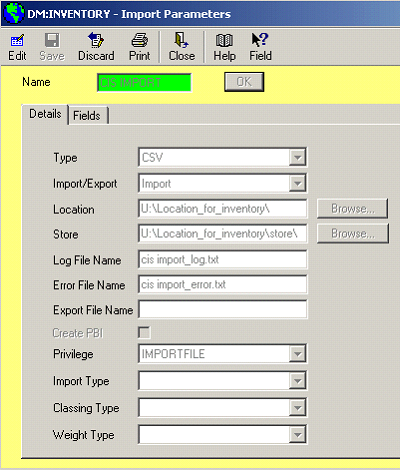
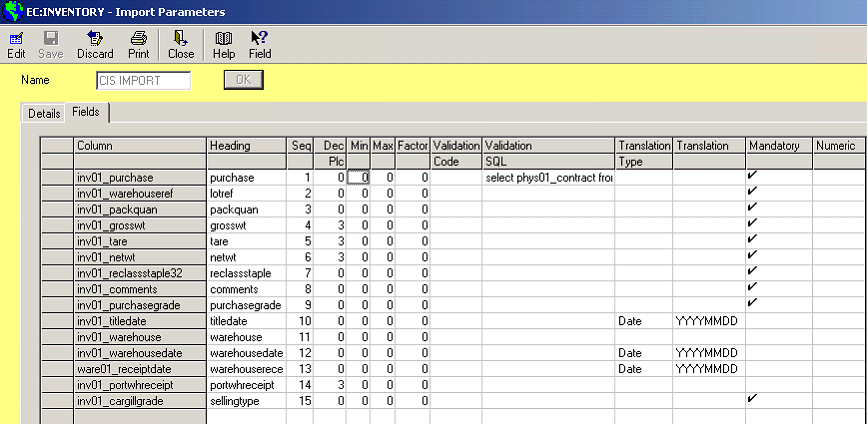
b. Create CSV file for import of lots (columns A to I are mandatory)

c. Import Lots
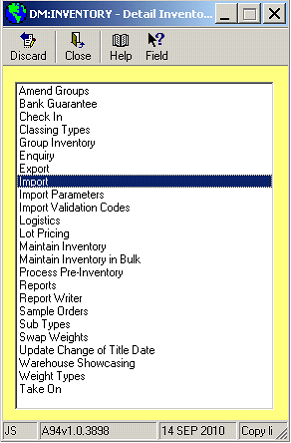
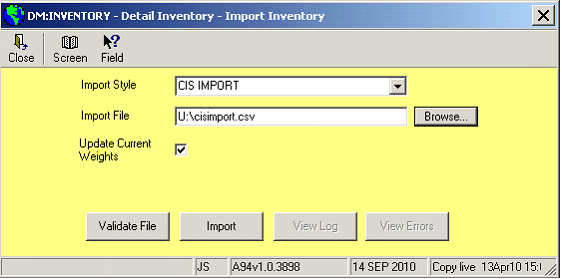
d. Select Import Style & Import File and click ‘validate file’
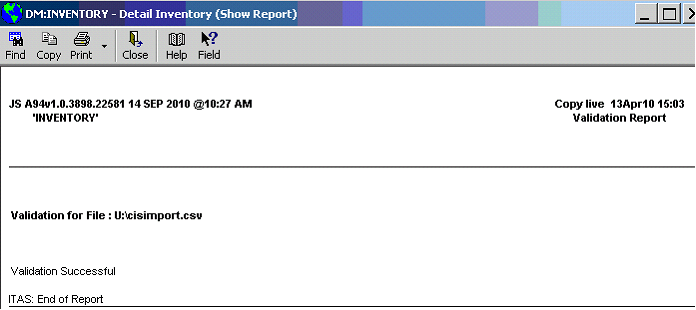
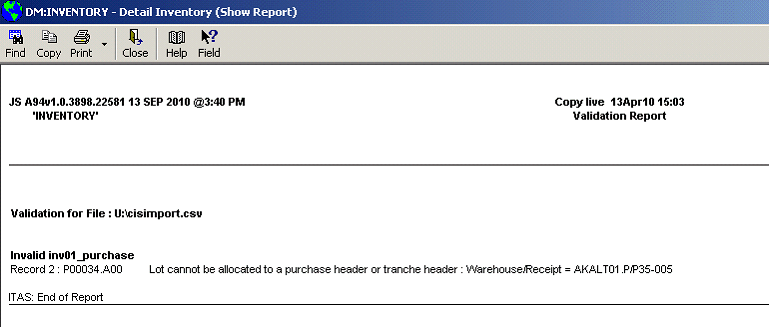
Validation successful means that you can import the lots in ITAS. If error, modify CSV file & re-validate file until successful. Example of error message:
e. To import file click ‘import’
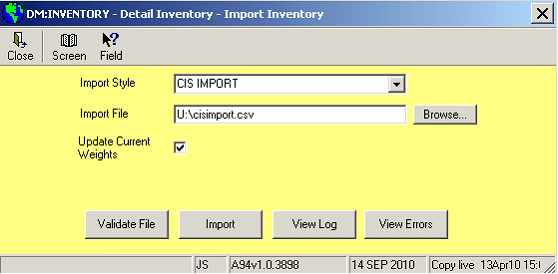
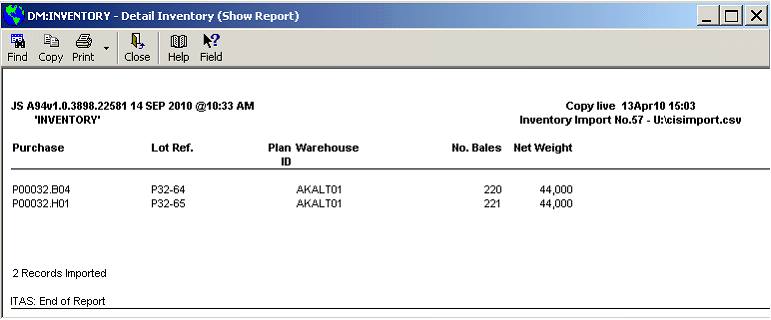
Import confirmation report:
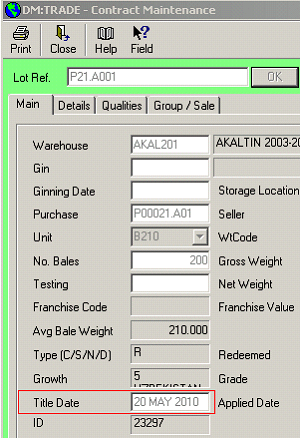
Title dates are shown on the maintain inventory screen. They can be updated from this screen (on a lot by lot basis)
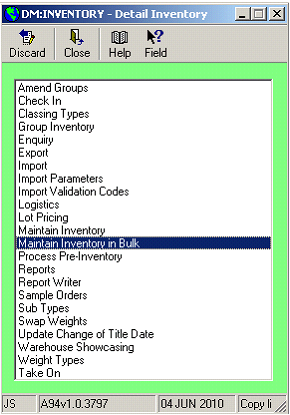
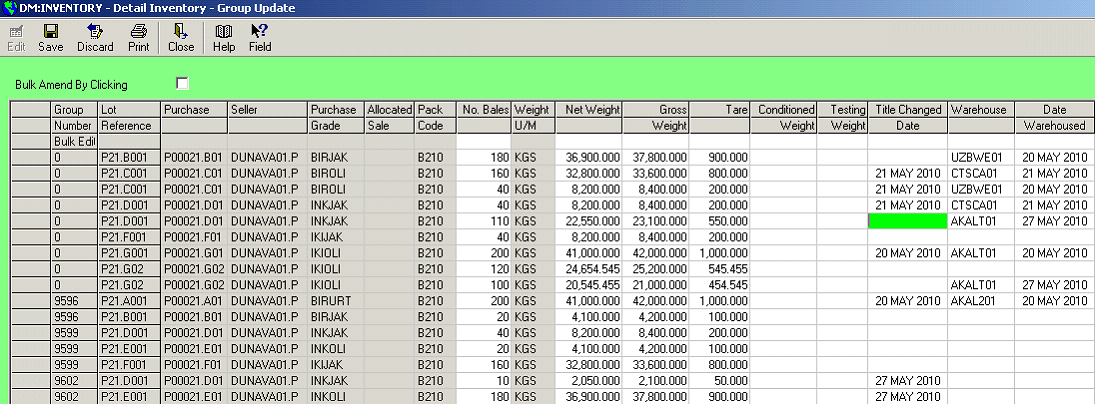
If you wish to set title date for a group of lot, you can use the maintain inventory in bulk screen
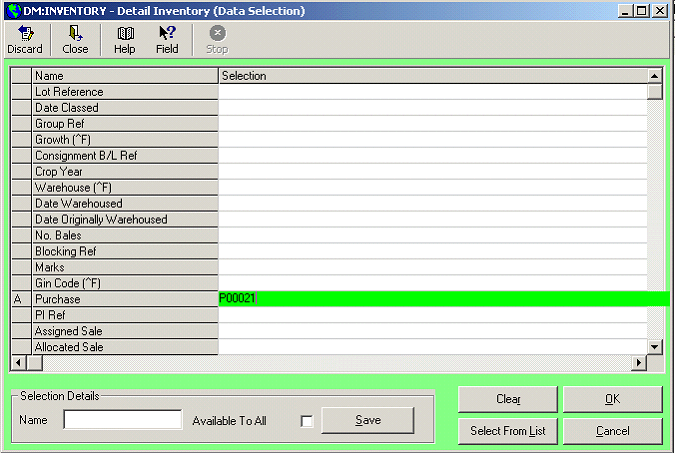
The next screen is used to select the lots you wish to amend. In the example below we selected all lots related to purchase contract no. P00021 but the selection could be made by origin/warehouse/grade etc.
Press Edit, then update title dates for all the lots required. Press Save.
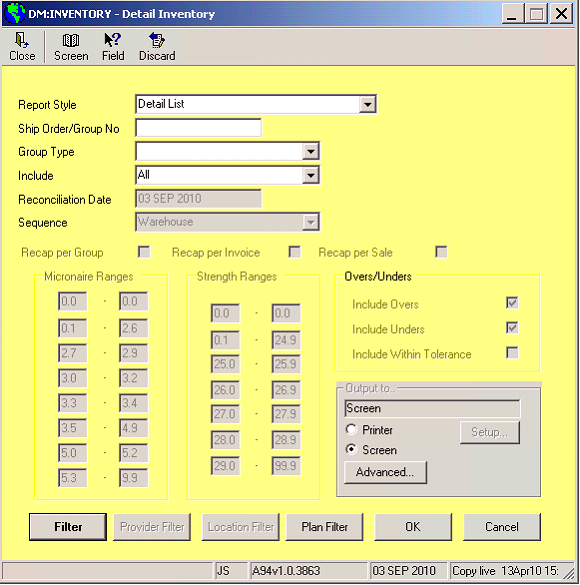
Go to: INVENTORY/Reports
Report style: DETAIL LIST
Filter by purchase contract number
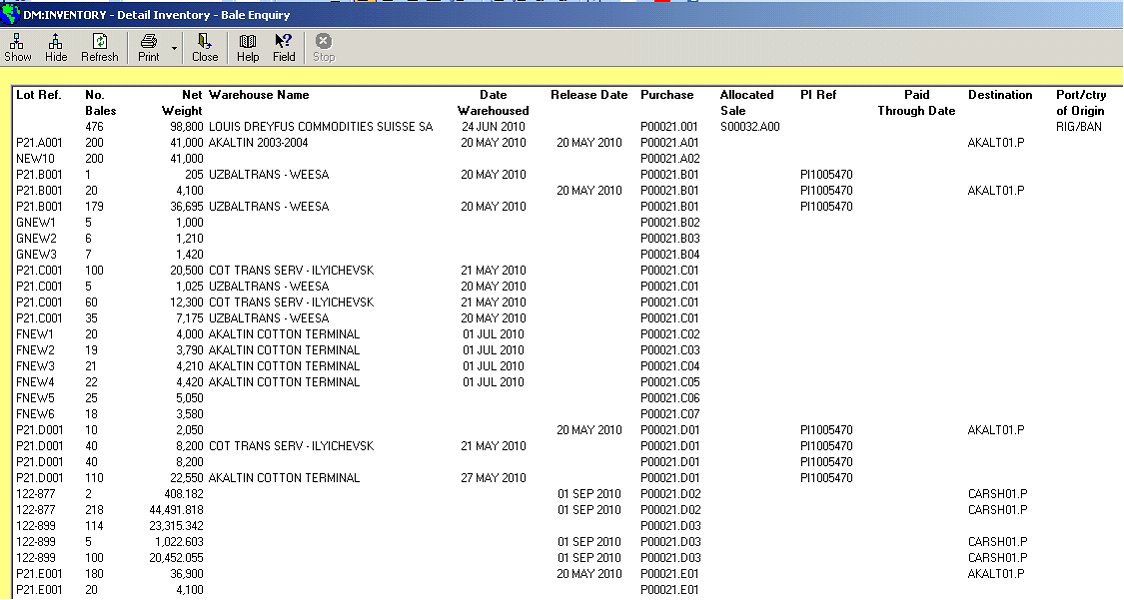
Click on Lot ref. to see the lot’s details (can not be amended – just viewed)
In order to change of title dates/warehouse/date warehoused etc. of several records at once, go to Inventory/Maintain Inventory in Bulk.
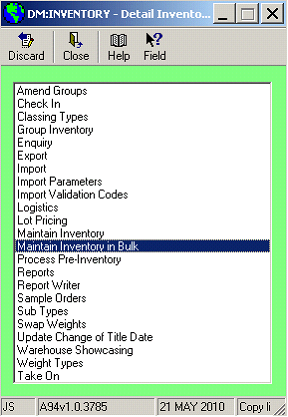
Press Edit
Update changes

SAVE
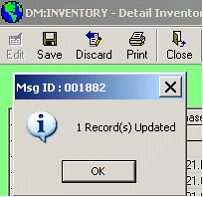
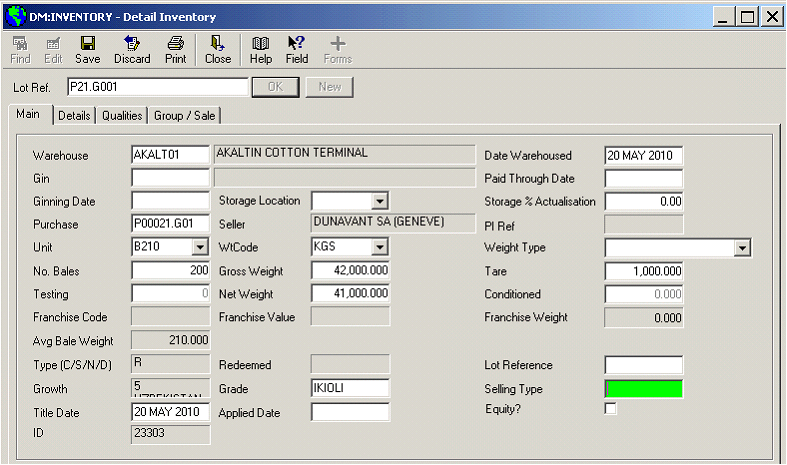


The first step for stock movements is the group the inventory (ie. create truck/wagon loads)
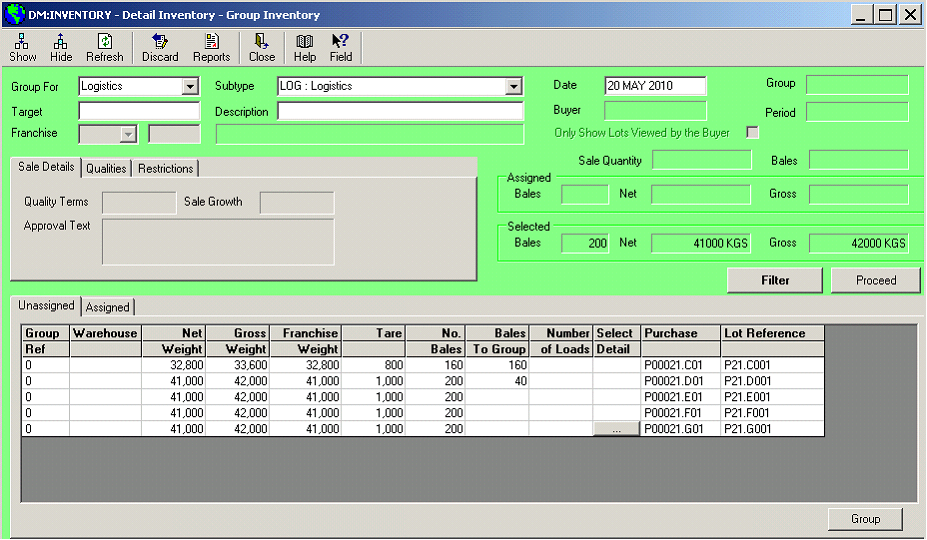
Go to: INVENTORY/Group Inventory
Group for ‘Logistics’
Subtype ‘LOG: Logistics’

Filter by purchase contract number
Click “proceed”
Select number of bales of each lot you wish to group together.
Click “group”
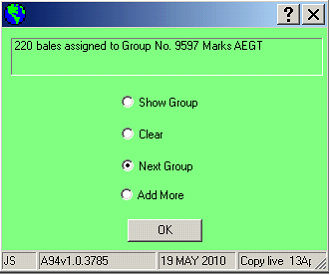
Select ‘system generated’ and a group number and Marks will be generated
Go to: INVENTORY/Logistics
Select SubType ‘LOG: Logistics’ and enter the group number in Shipping Orders box, Click OK

Message ‘Create New Record?’
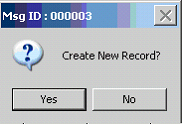
Click ‘Yes’
SAVE
Plan ID number is generated
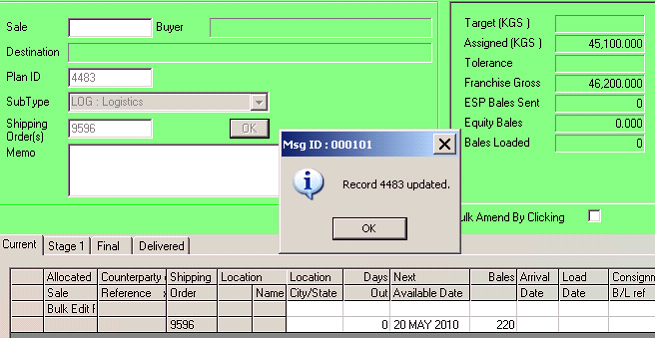
Click “OK”
Press “Edit”
To search by lot ref. which group/logistics lots are a part of go to: INVENTORAY/Logistics/Find
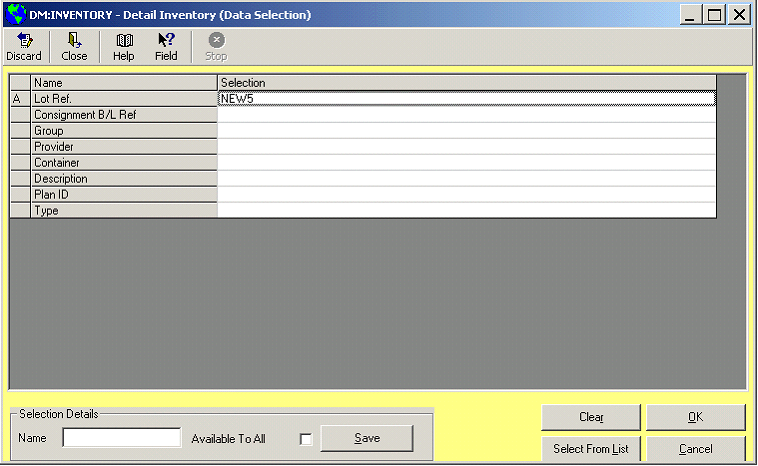
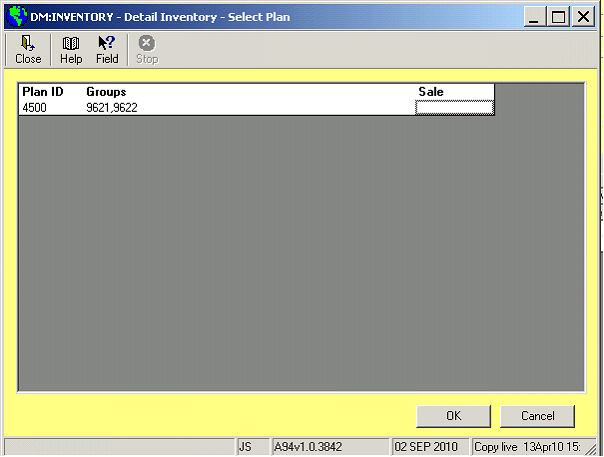
First Level (EXW Uzbekistan warehouse)
The below fields should all be part of lot creation import process in addition to the regular fields (no. of bales, GW, NW, purchase no.)
Ownership date: YES same as warehousing date

Date Warehouse: FCR date of entry

Warehouse: Location of cotton

Port / WH Receipt: Warehouse receipt number.

Comments: buying term & destination

Receipt date: Warehouse receipt date

Logistic screen at this level: shows shipping orders (groups) part of the Plan ID as located in the Akaltin cotton warehouse.
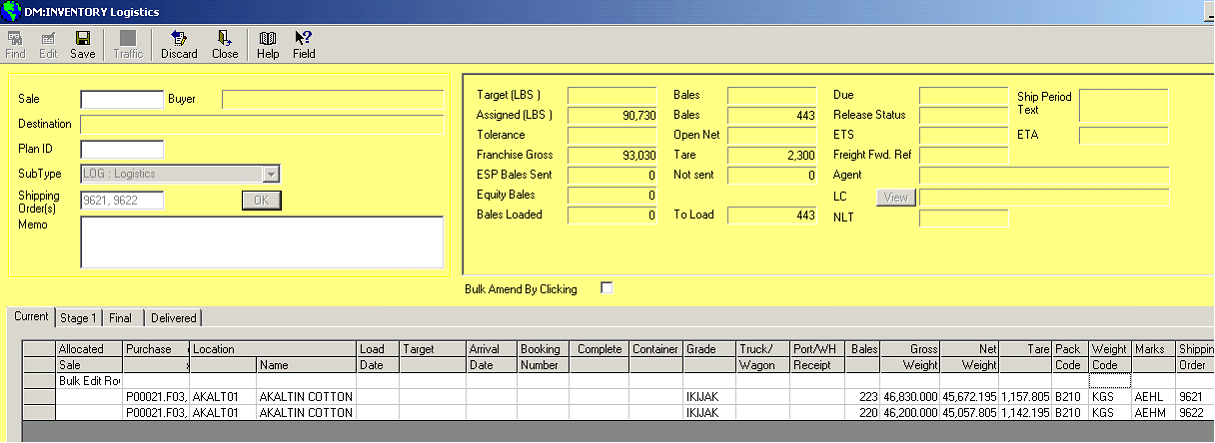
Second Level (Transport from EXW Uzbekistan to port warehouse)
The below fields should be manually updated in the logistics screen after bales have been grouped to form wagon loads.
Booking Number: Railwaybill or Roadwaybill number

Load date: Date of Dispatch

Arrival date: Same as Load date (date the status changes from: EXW Uzbekistan to: in Transit to port warehouse)

Truck/Wagon: Wagon no. or Truckplate no.

Target: Transit to destination account (example: BANDA01 is for “transit to Bandar Abbas”)

In order to change the status of the goods, it’s necessary to mark the stage as complete. In the logistics screen, select the line then right click: Mark Complete. This operation must be effected for each line in the logistics to update status of all wagons.
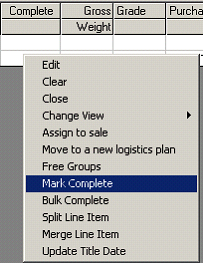
Click: Yes

Click: OK
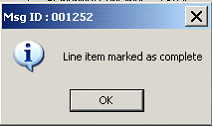
If you look at the inventory screen of any of the lots which were part of this logistics plan, the warehouse shows BANDA01 meaning in transit to Bandar Abbas and date warehoused 04 AUG 2010 representing the departure date of the wagons from Uzkekistan.

Now that the goods are in transit, it is necessary to input the destination of the goods (port warehouse)
The first thing to do is to add a new stage to the logistics Plan ID.
To do so Right click: add stage

New stage is added to plan ID

Stage 2 tab shows location of the goods as BANDA01 (in transit to Bandar Abbas)

We need to add a load date (date of departure of wagons from Uzbekistan)

Target: Destination of cotton, name of warehouse at port

Then SAVE changes. At this stage the system knows to which destination the cotton is bound to.
Third Level (Arrival at port warehouse)
Target: Warehouse name (already entered at previous level, no need to change)
Arrival date: enter the date of entry in stock at port

Then you must Mark Complete the stage in order to update the status of the lots to “port warehouse”


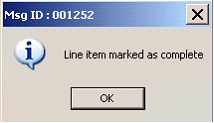
On logistics screen, the tab ‘delivered’ has been updated and location of goods is the previous level target.

In the inventory, the lots linked to the logistics plan have been updated with latest status
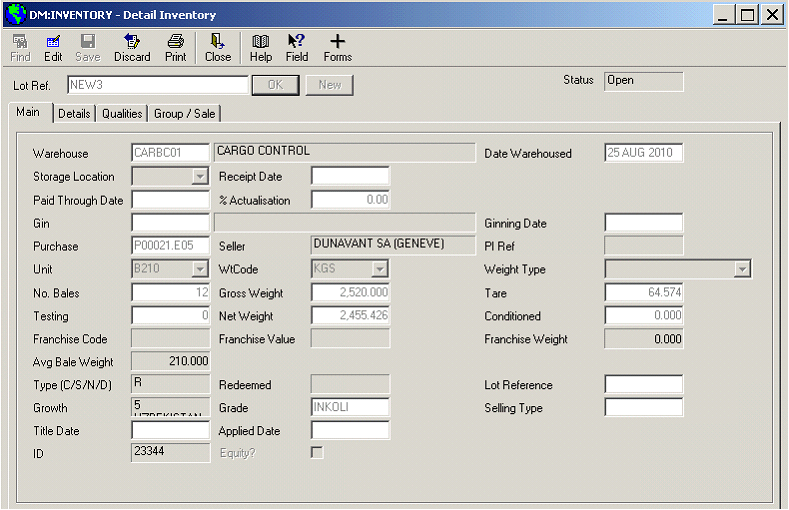
Fourth Level (FCR After 30th day in stock port – optional)
On stage 2: the location has automatically been updated according to previous level “target”

a. Warehouse Receipt number and date (for the time being, the WH receipt date field is missing)

b. Warehouse name (already updated at previous levels)
SAVE
c. Update Title date


SAVE
First Level (Transport to port)
a. Railwaybill or Roadwaybill number (booking number field)
b. Wagon or Truckplate number (Truck/Wagon field)
c. Load Date (departure date)
d. Target (name of destination warehouse)

Second Level (Stock at port)
a. Warehoused date (arrival date)

To confirm this stage has been completed (ie. Target + arrival date)
Click Edit, right click, then “add stage”

A new stage is added to the logistics screen

On stage 2 you can now see the name of warehouse under lot’s Location.

Third Level (FCR After 30th day in stock port – optional)
d. Warehouse Receipt date
e. Warehouse Receipt number
f. Warehouse name (target)
g. Warehoused date (arrival date)
h. Title date updated according to warehouse receipt date

Updating the title date after receipt of warehouse receipt. On stage 2, right click “update title date”

On the next screen (title date update for plan 4485)
Add title dates for the concerned lots

SAVE
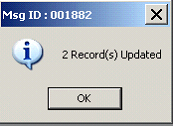
Checking title date and lot history
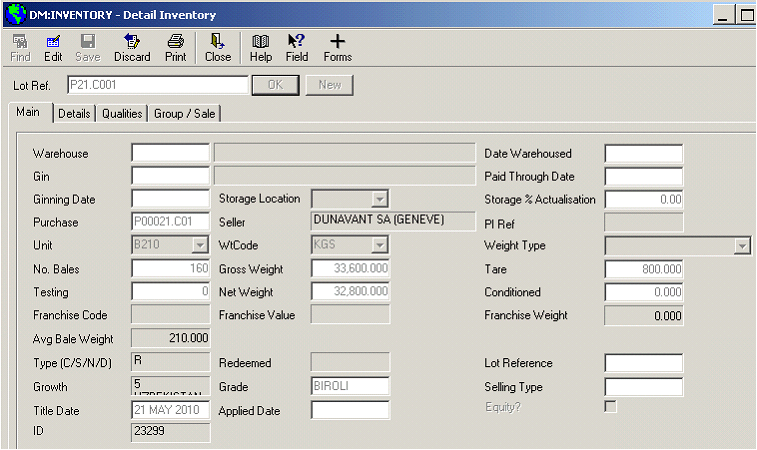
Why isn’t the warehouse updated???
Because the logistics stages need to be completed, in order to release bales from plan and to update warehouse details in the “maintain inventory” screen. To do this, go to stage 1 and right click “mark complete” and do the same with stage 2.

In the detail inventory screen, you can now see the Warehouse as well as title date.
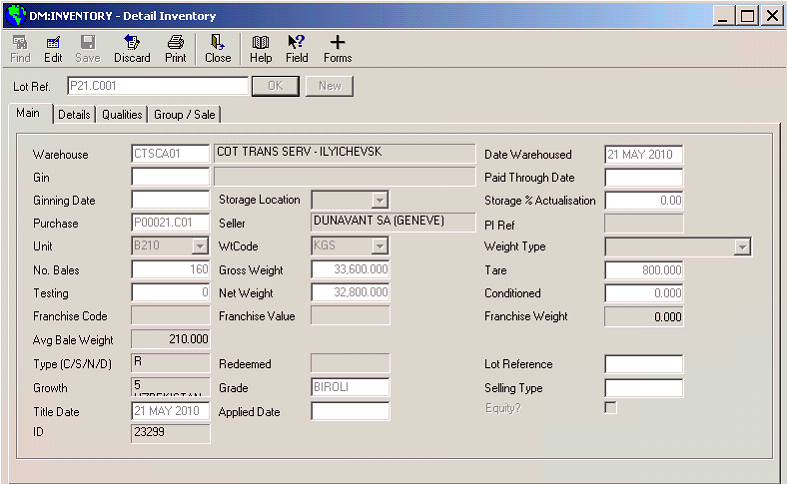
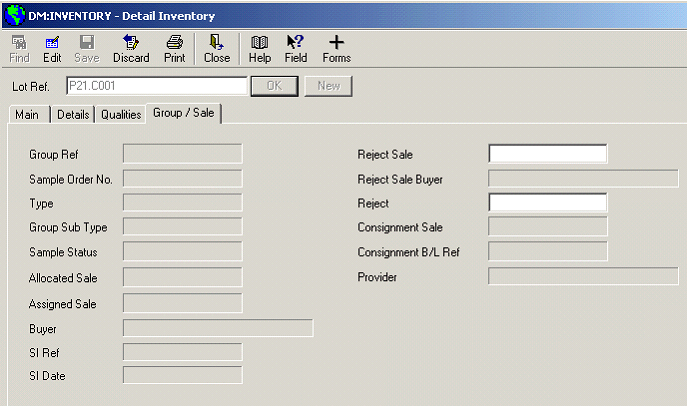
In the group/sale tab all the details with regards to group and plan ID have disappeared as the lot have been released when we marked the logistics stages complete.
First Level (Transport to Russian warehouse)
a. Railwaybill or Roadwaybill number
b. Wagon or Truckplate number
Second Level (At Uzbekistan border)
a. Title date updated according to the date the wagon/truck passed the border
Third Level (Customer warehouse Russia)
a. Warehouse name (customer name)
b. Warehoused date (arrival date)
· Remove lots from the plan (to regroup and move later or add next stage)
· Add load dates and arrival dates (release from warehouse, outbound)
· Mark stages as complete = lot being marked as having arrived at destination warehouse.
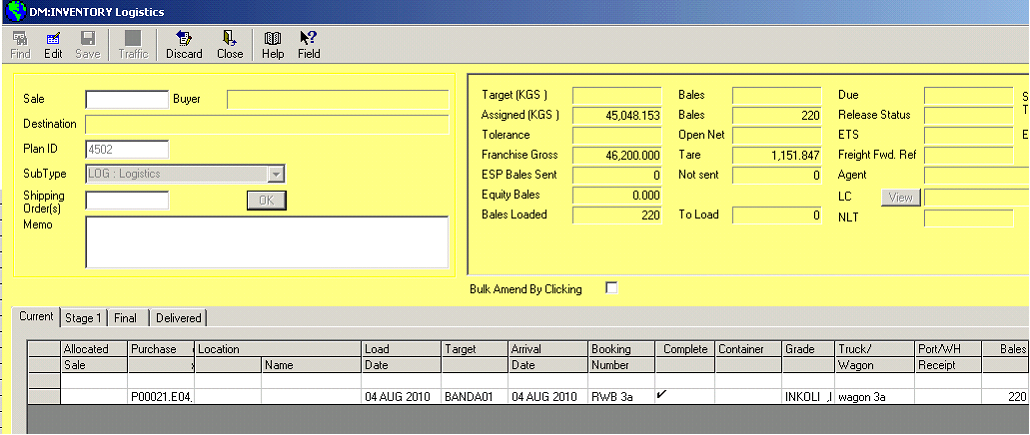


Split lot in inventory
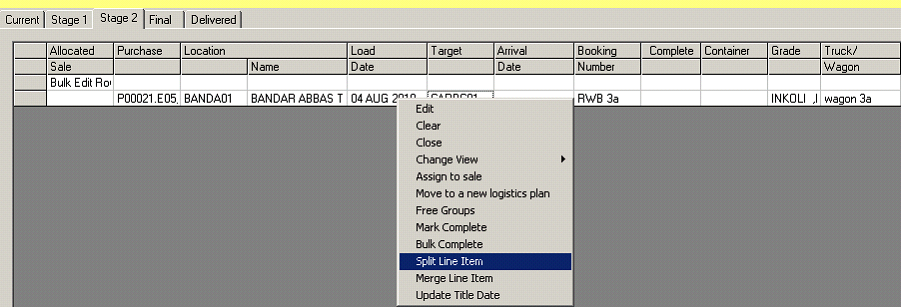
Select number of bales you wish to split and click split

As it stands you would need to split in Logistics to create 10 and 210 lot Groups.
In INVENTORY/Maintain you should then recall the 10 bale lot split and re-enter the Purchase Header against it. This would move the 10 Lots on to a new split.
The new problem is the following:
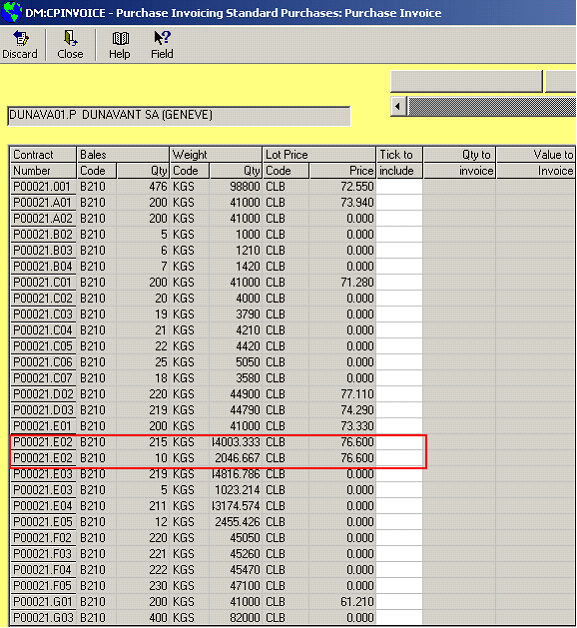
As the buying term is FOB Bandar Abbas, the ownership of the goods is transferred upon loading on vessel. The supplier will invoice us only the lots for which we have ownership (title date). So if only 10 bales of a 220 bales lot is loaded, the supplier will only invoice us for these 10 bales.
The problem is that I can't split the 220 bales tranche into 10 and 210 bales. On the CPinvoice screen we only see the total tranche amount for 220 bales.
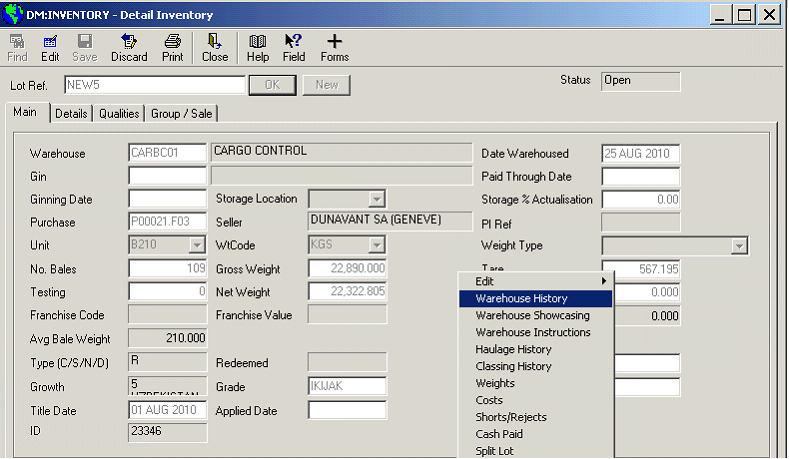

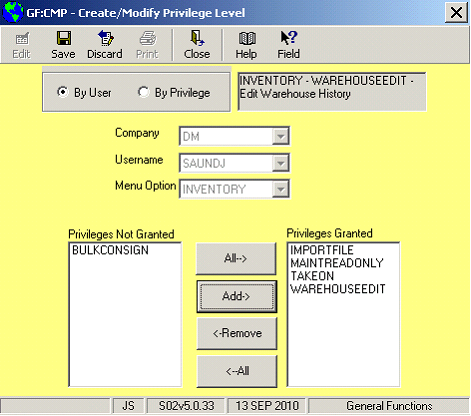
To edit previous level warehouse details, users must be granted the privilege ‘WAREHOUSEEDIT’
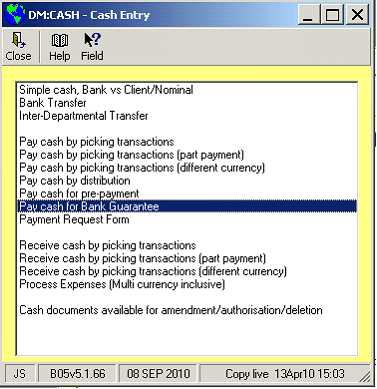
Go to: FINMAN – IBC – CASH
Select: Pay cash for Bank Guarantee

Main Tab
Client: name of supplier
Expense Code: prefina
Department: contract dept.
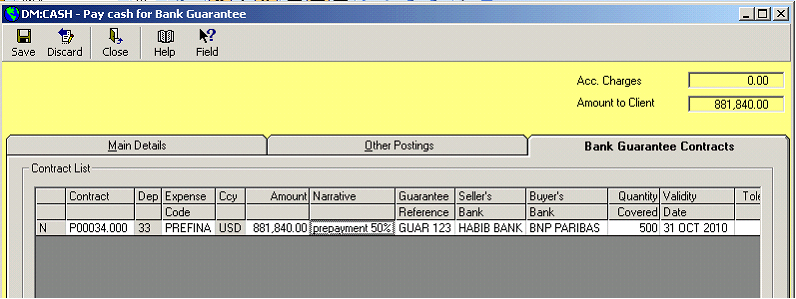
Bank Guarantee Contracts Tab
Contract: contract number
Expense code: prefina
Amount: prepayment amount
Narrative, Guarantee ref., seller’s bank & buyer’s bank (our bank)
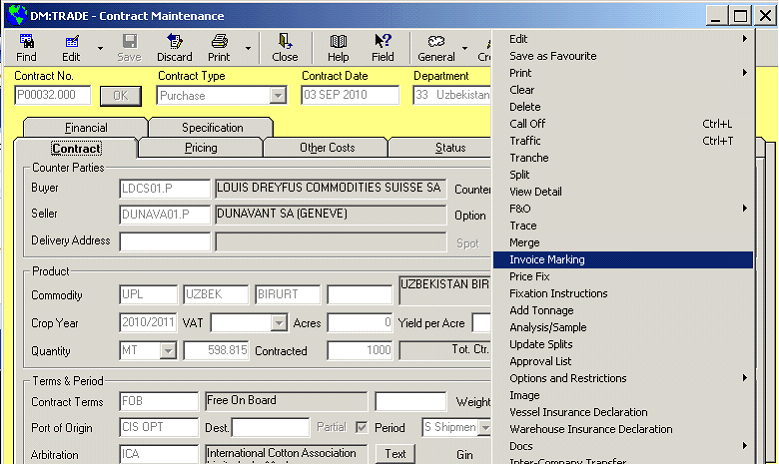
To view the bank guarantee link to a contract: from the contract’s trade screen right click ‘invoice marking’
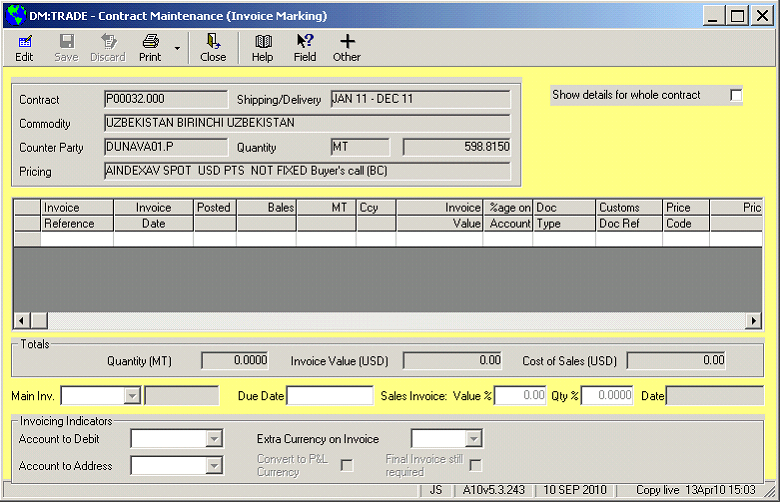
From the invoicing marking screen Click ‘Other’
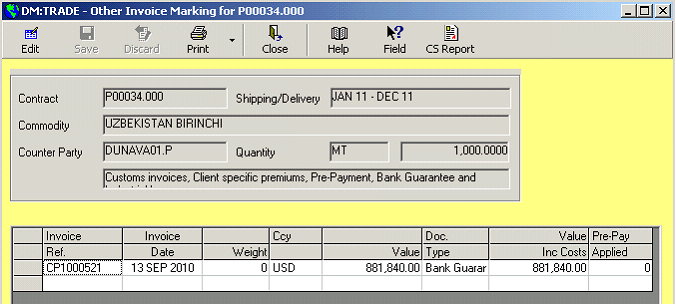
Go to: COTTON – INVENTORY – BANK GUARANTEE
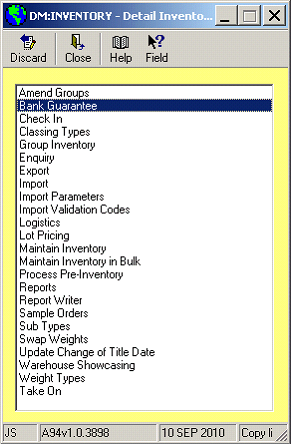
CTRL+F in the bank guarantee ref. box to find your bank guarantee
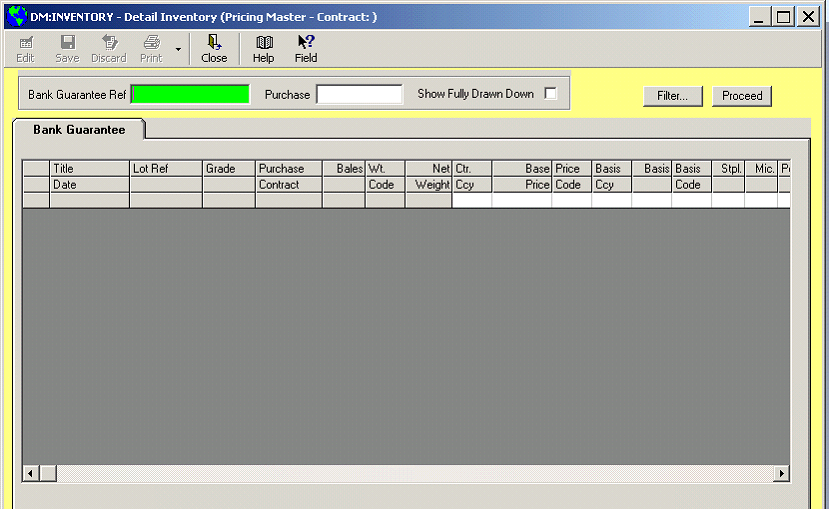
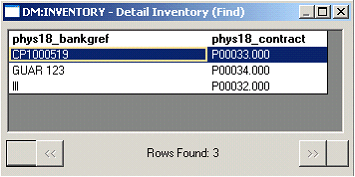
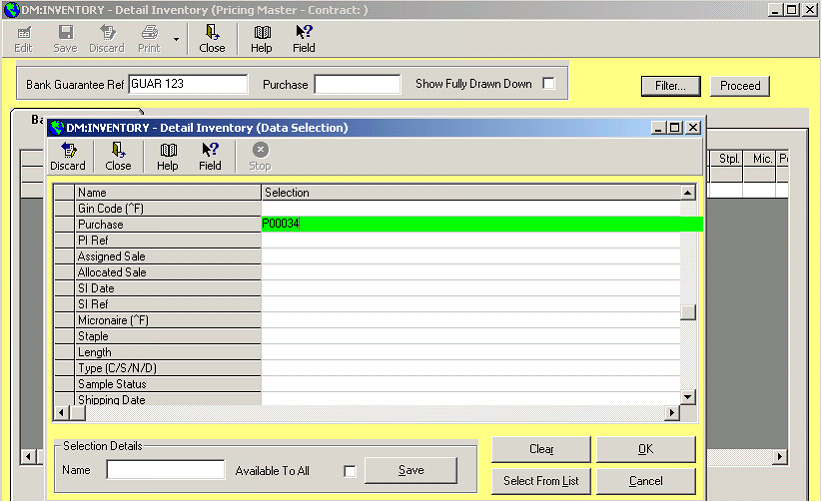
Filter by contract number, Click ‘Proceed’
Click ‘Edit’ and tick ‘Draw Down’ all the lots you want to reduce bank guarantee with, then click ‘save’
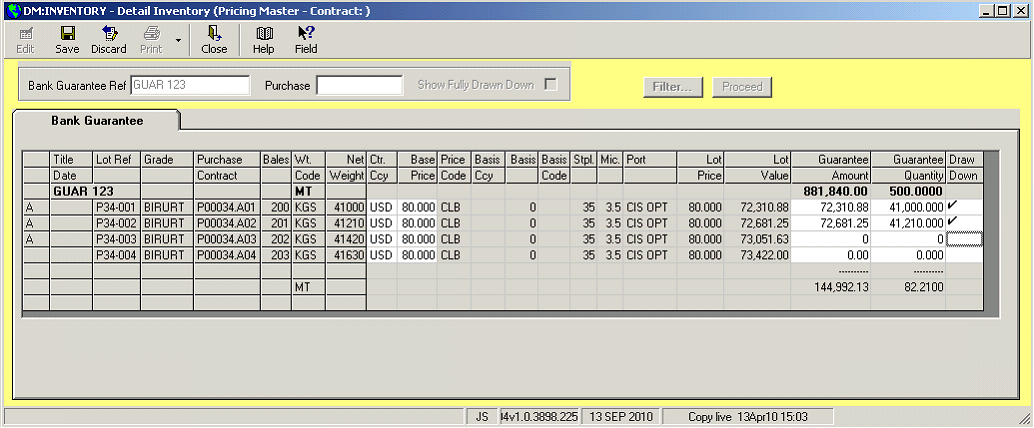
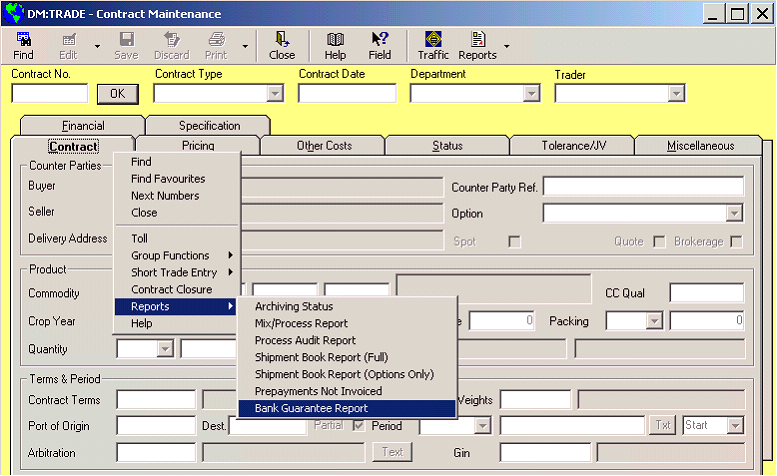
Filter by purchase contract number, the bank guarantee will appear as under.

Contract No. P00032.000
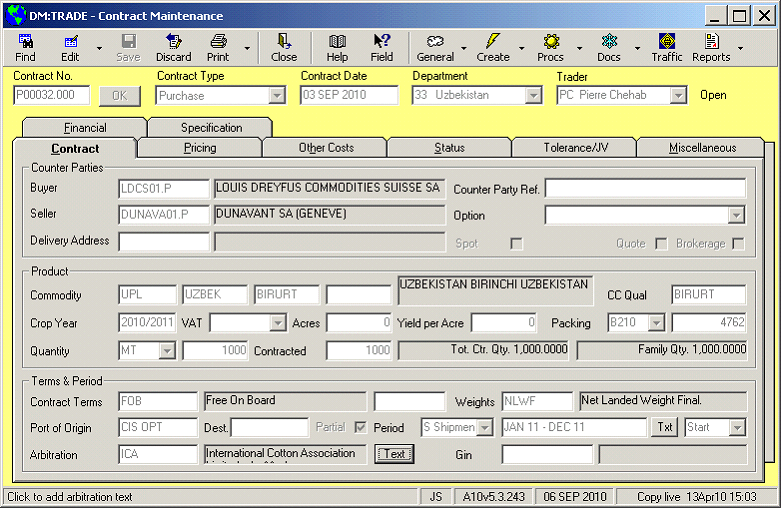
Tranche for the 8 grades (A00 to H00)

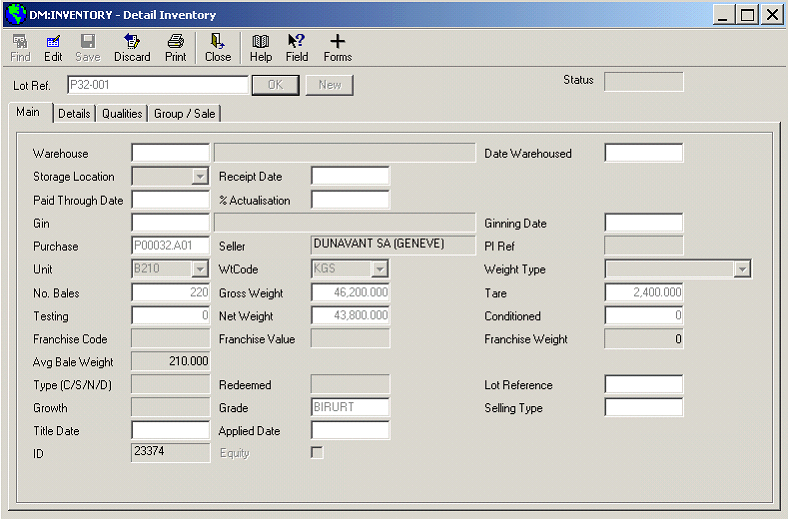
Lot P32-001 (ex P00032.A00) FOB Bandar Abbas, No title date.
Change destination on contract split of lot to FOB B-A
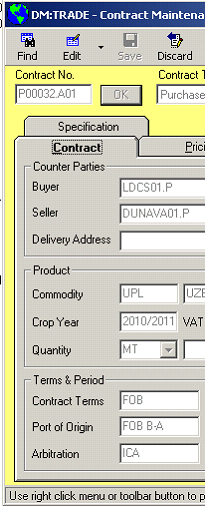
Lot P32-002 (ex P00032.B00) FCA Uzbekistan Terminal, with title date 3 SEP 2010
Change destination on contract split of lot to FCA UZB
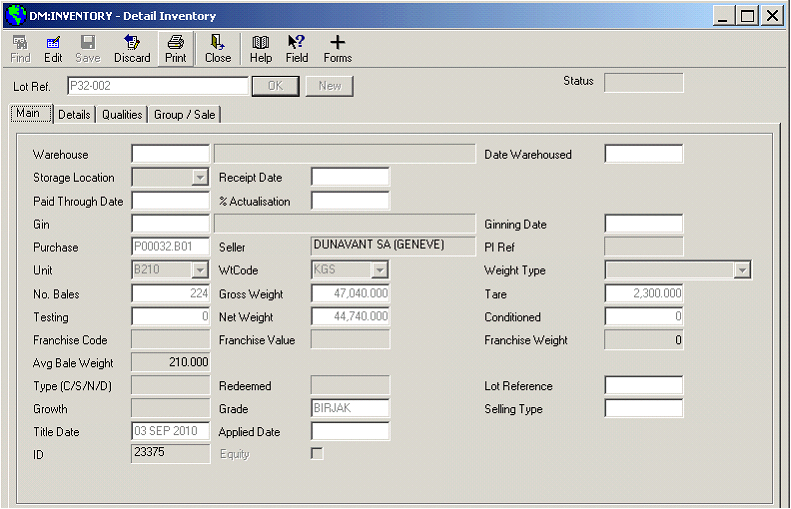
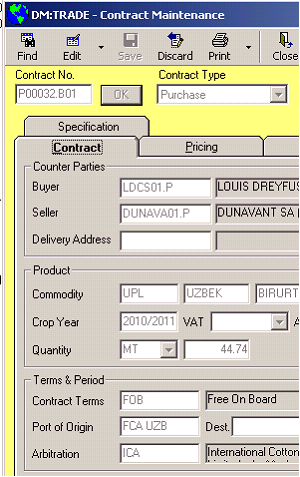
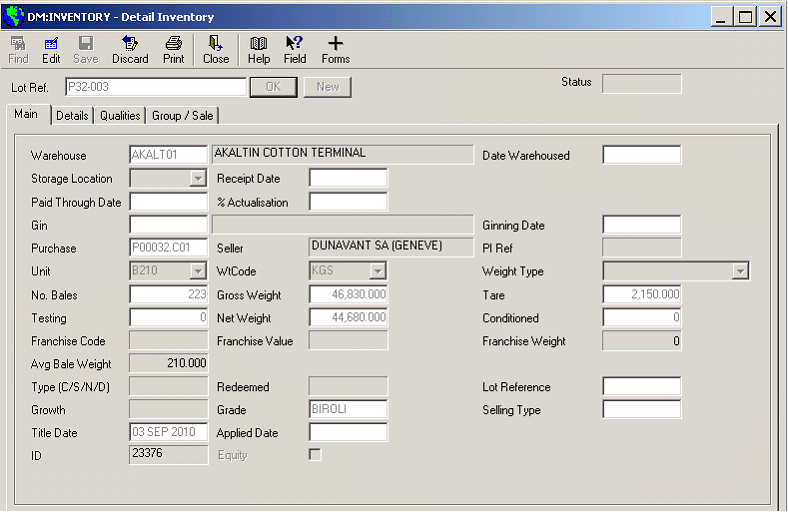
Lot P32-003 (ex P00032.C00) EXW Uzbekistan, with title date 3 SEP 2010
Change destination on contract split of lot to EXW UZB

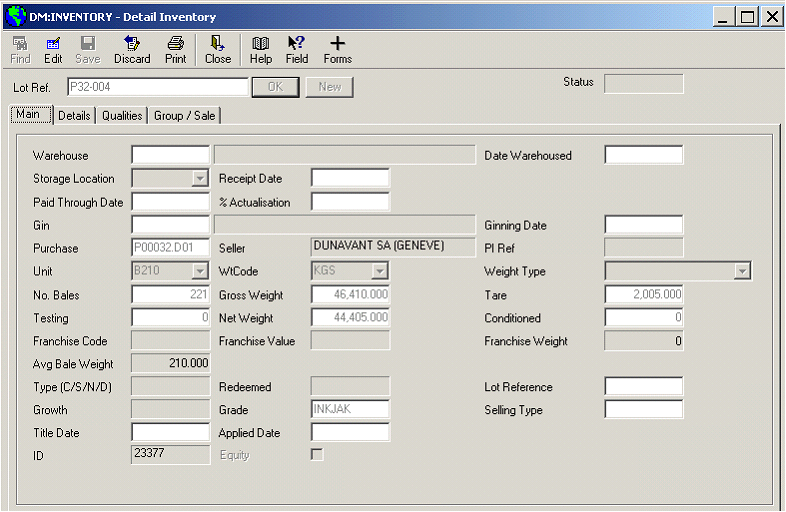
Lot P32-004 (ex P00032.D00) FOB Riga, no title date
Change destination on contract split of lot to FOB RIGA
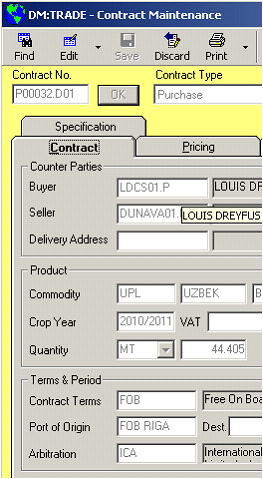
Lot P32-005 (ex P00032.E00) DAF Uzbek Border, no title date
Change destination on contract split of lot to DAF UZB
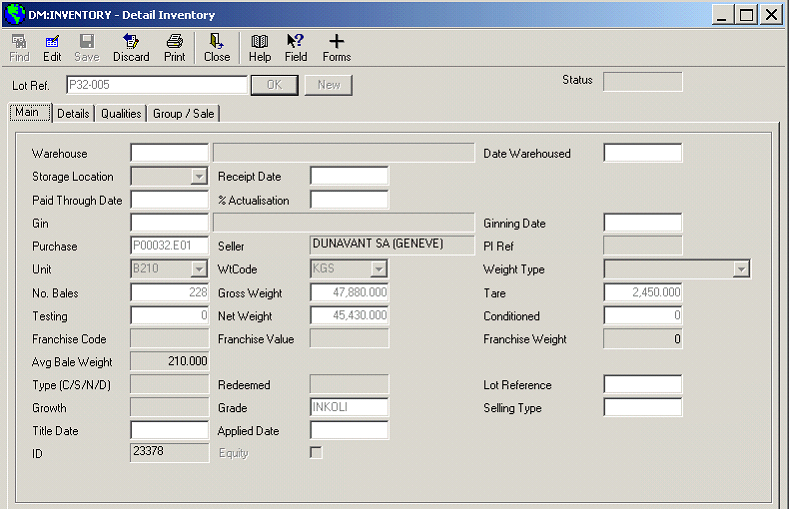
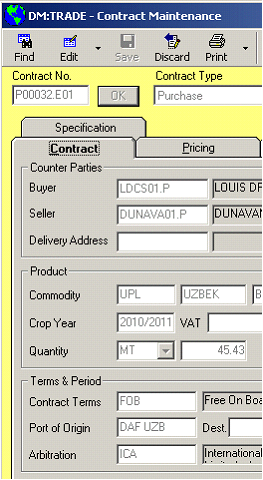
Lot P32-006(ex P00032.F00) CPT Russia, no title date
Change destination on contract split of lot to CPT RUSS
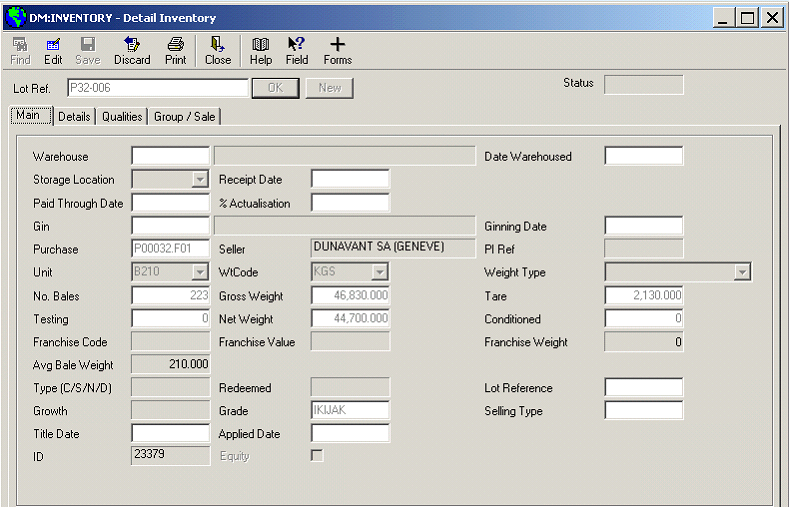
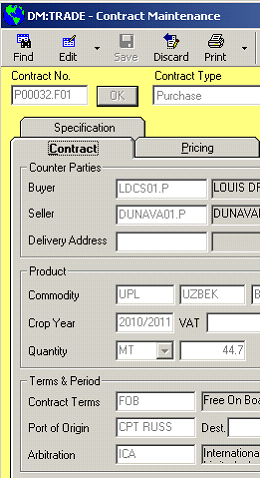
Lot P32-007(ex P00032.G00) FOB Ilyichevsk, no title date
Change destination on contract split of lot to CPT RUSS

